30 Day Arm Challenge
Yay! It’s time for a new challenge: the 30 Day Arm Challenge. We often hear from women that training their arm muscles is not their favourite activity. That’s probably because arm exercises can get pretty intense, but did you know that your shoulders and upper back tend to carry less fat than the rest of your body? So doing the right arm exercises can give this area a nearly instant make-over! You will feel and see muscles you didn’t even know you had!
WHY YOU SHOULD JOIN US
There are so many reasons you should join us. When you repeat something for 30 days you subconsciously teach yourself to add a certain routine to your lifestyle. So it makes it easier to work out! Ain’t that awesome! Also:
- It helps you get fit (obviously)
- You train yourself to be disciplinary
- It’s great for your self esteem
- We love that you workout with us, no matter how many miles we are apart!
AND HERE’S HOW…
We have made a schedule where you can see what kind of exercises and how many you’re supposed to do throughout the month. This time the one and only Fit Girl Chris is gonna show us how it’s done. If you are a big fan of the tanktop Chris is wearing, then get your own in the #FITGIRLCODE webshop.
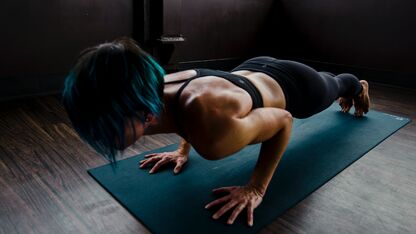
1. Normal push-up
The beauty of the push-up is that you can do it anywhere, anytime. This exercise targets not only your arms and chest but also gets a burn going in your core.
Instruction: Start with a face-down prone position on the floor. Keep your feet together. Your weight should be on your chest // Position hands palms-down on the floor, slightly wider than your shoulders, with your elbows pointed towards your toes // Now raise yourself using your arms. At this point, your weight should be supported by your hands and the balls of your feet // Make a straight line from your head to your heels. This position is called a "plank," which is used for various other exercises //This is the beginning and end position of a single push-up.

Down on your knees
If you are not ready to do a regular push-up yet, then try doing them on your knees. You can also start with regular push-ups and switch to knee push-ups when it gets too heavy. Follow the instructions for regular push-ups, but keep both knees on the floor. Be sure to use your chest, shoulders and triceps to lift yourself, not your hips or back.

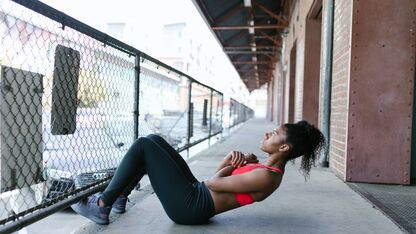
2. Reverse push-up
A reverse push-up is the complete opposite of a regular push-up. Your hands and feet are still contacting the ground, except you are in an inverted position.
Instruction: Start out lying on your back with your knees bent and feet flat on the floor// Place your hands on the ground by your ears with your palms flat and your fingers facing your feet. Your elbows should be up in the air at this point // Lift your hips up toward the ceiling and simultaneously push your shoulders off the floor by activating your arms //Fully extend your arms, arch your back and lift your heels off the floor// Slowly lower yourself back to the ground and repeat // When you lift your body up, you should form a nice, consistent arc and your head should be hanging straight down.

3. Kettlebell lifts
You may have seen more and more people at the gym swinging what looks like a cannonball with a handle. Those weird looking weights are called kettlebells and they’ve been used by Russian strongmen for over two centuries to “become strong like bull.” If you don’t own a kettle bell, you can get one here, or use a dumbbell or even a big soda bottle filled with water.
Instruction: Sit down on your knees and place your kettlebell (/dumbbell/soda bottle) in front of you //Grab the weight with your both hands, keep your elbows to your side and raise it up to your chest and back // Make sure you keep your back straight en push your pelvis forward when you lift up the weight.